

Wilton Cake Decorating 2a Coupler


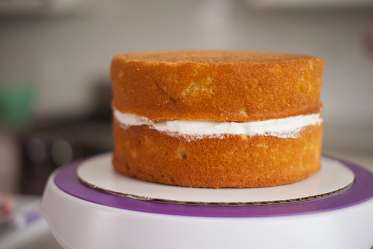
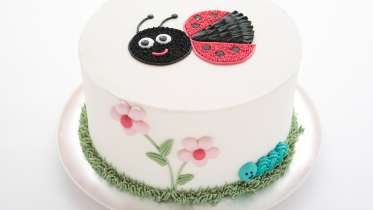
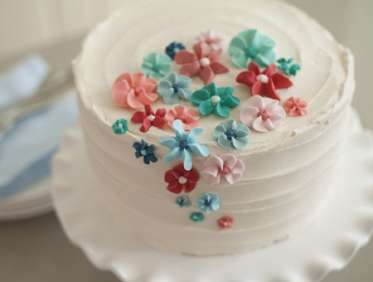
In Part 4, you will learn how to make a show-stopping buttercream-iced cake, featuring royal icing drop flowers. Emily will show you how to make royal icing from scratch, mix colors to make a harmonious palette, and then use a variety of decorating tips to make flowers of different shapes, sizes, and hues. The surface of the cake is iced with a beautiful free-motion buttercream swirl, and then the drop flowers are grouped on top of the cake to create a stunning, organic arrangement.
Learn how to:
What you'll get:
- Learn how to make a show-stopping buttercream-iced cake, featuring royal icing drop flowers
- 4 HD video lessons you can access online anytime, anywhere
- Detailed supplies list
- Step-by-step expert instruction from the experts at Wilton
- The ability to leave comments, ask questions, and interact with other students
Chapters
| 00:53 |
| 02:23 |
| 08:02 |
| 08:45 |
| 07:57 |
Materials
Here's what you'll need:
Royal Icing ingredients:
- 5 tablespoons water
- 3 tablespoons Wilton Meringue Powder
- 4 cups sifted confectioners' sugar
Baking Tools & Ingredients:
- Your favorite 8 in. round x 5 in. high layer cake
- Measuring spoons
- Dry measuring cups
- Electric mixer with beaters
- Wilton Icing Colors (Teal/Kelly Green/Black/Rose/Rose Petal Pink/Red-Red/Burgundy/Orange/Royal Blue/Sky Blue/Creamy Peach and Ivory)
- Toothpicks
- Pin
- Decorating bags (Wilton Featherweight® or disposable)
- Wilton Twist Quick Coupler
- Wilton Decorating Tips (3/131/225/190/2D and 1B)
- Wilton Bag Ties (optional)
- Spatula (angled or straight / 9 or 11 in.)
- Cake boards
- Parchment paper
- Buttercream Icing (see recipe in Week 1) or Wilton Creamy Decorator Icing or Wilton White Decorator Icing – 3 to 4 cups
- Turntable
Browse members' projects from this class, add them to your Favorites, and share your own work!
Notes
Your timecode tags and notes for this section
Wedded Bliss
Paper Flowers: Make a Wild Rose and Thistle Centerpiece
Livia Cetti of The Green Vase
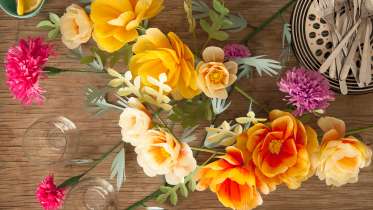
In this class, Livia shares her technique for making wild roses and thistles out of tissue paper. From dip-dye bleaching the paper to attaching the petals and leaves with floral tape, Livia covers every step of the paper-flower making process. She then shows you how to display the branches to make a gorgeous, organic tabletop centerpiece, perfect for weddings, parties, or any festive gathering.
![]()
![]()
![]()
DIY Flower Bouquets
100LayerCake
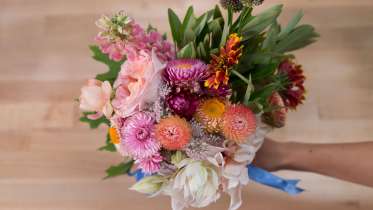
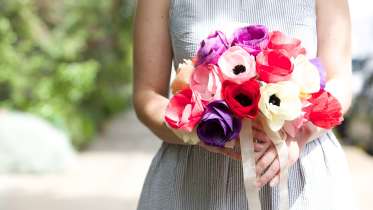
In this colorful class, the wedding experts at 100 Layer Cake demonstrate how to make perfect bouquets with help from Emily of Shotgun Floral. Learn how to make a gorgeous composition using lots of different varietals, and the best strategy for working with color. Once you've combined your favorite flowers into a stunning bouquet, you'll learn how to secure the arrangement with tape, ribbon and pins.
![]()
![]()
![]()
DIY Boutonnieres
100LayerCake
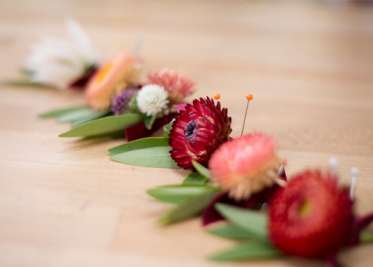
Learn how to make fresh flower boutonnieres from the wedding experts at 100 Layer Cake and Emily of Shotgun Floral. Emily gives tips for choosing focal flowers and greenery, and then demonstrates how to assemble and secure these tiny arrangements. In no time, you'll have a full set of boutonnieres ready for all of the groomsmen in your party.
![]()
![]()
![]()
Paper Flowers: Make an Anemone Bouquet
Livia Cetti of The Green Vase
In this colorful class, Livia shares her expert technique for making anemones out of tissue paper. She begins with an overview of how to cut and dip-dye bleach the paper, and then shares how to pleat the petals and attach them to floral wire with floral tape. Once you've made a batch of flowers, Livia shares professional tips on how to arrange them by color and shape and put them together into a gorgeous wedding bouquet or tabletop arrangement.
![]()
![]()
![]()
Pom Pom Garlands
Hello!Lucky
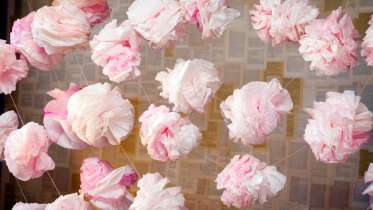
Dyed pale pink, these ethereal coffee filter pom-poms resemble cabbage roses, and they have a dramatic impact when hung in strands. Because of the dyeing and drying time, start this project early, working in batches — especially if you anticipate needing a large number of strands. Hang them in your living room, over your dinner table, or in your cocktail area for instant DIY delight!
![]()
![]()
![]()
Make Tissue Paper Pompoms
Courtney Cerruti
Paper pompoms bring a colorful and textured floral touch to any celebration, especially weddings and parties. Courtney demonstrates how to create a gorgeous, oversized pompom from tissue paper, and also gives ideas for customizing color, shape and size.
![]()
![]()
![]()
Paper Flowers: Make Hollyhocks and Delphiniums
Livia Cetti of The Green Vase
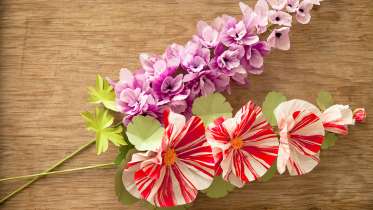
Learn how to make towering hollyhocks and delphiniums from paper – perfect for long-lasting, show-stopping arrangements. Before you start assembling the blooms, Livia teaches bleaching and hand-painting techniques that will give your petals realistic coloration and texture. From there, you'll learn how to make the individual flowers and construct these stunning stems.
![]()
![]()
![]()
Flower Arranging
Studio Choo
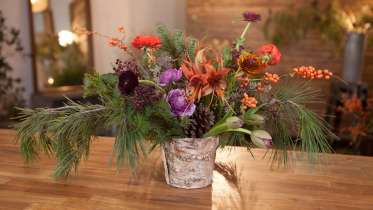
In this class, Alethea and Jill of Studio Choo teach the basics of making a gorgeous tabletop centerpiece, perfect for a holiday dinner. The arrangement begins with a lush framework of seasonal evergreen branches, and grows with flowers like amaryllis, ranunculus, and tulips that add pops of color. Berry branches are added last to create movement. As Jill explains her design process, the arrangement takes shape before your eyes, demonstrating how easy it can be to create an eye-catching centerpiece--even if this is your first time playing with flowers.
![]()
![]()
![]()
Cricut Paper Flowers: Make Potted Paperwhites
Lia Griffith
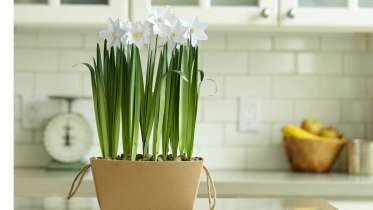
In this class, paper flower artist Lia Griffith shows how to create realistic paperwhites using the Cricut Explore cutting machine. Lia demonstrates how to use the scoring tool to create perfect creases in the flowers and leaves, and then shows how to assemble the blooms to make a stunning arrangement.
![]()
![]()
![]()
Paper Flowers: Make a Charm Peony Hair Clip
Livia Cetti of The Green Vase
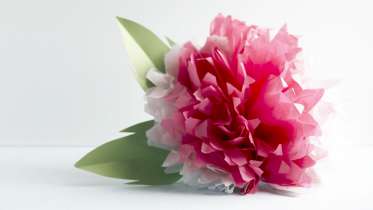
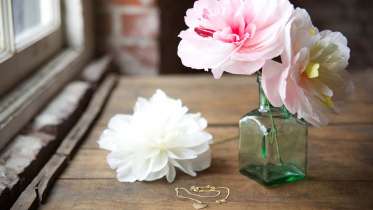
In this class, paper flower artist Livia Cetti shares her technique for making everyone's favorite flower: the peony. You will learn how to bleach the paper, cut out the petals, and put them all together to make a lush, realistic bloom. She then teaches you how to attach a hair clip to the bloom, making it a perfect long-lasting accessory – and a perfect way to enjoy this special bloom year-round.
![]()
![]()
![]()
Paper Wedding Crafts: Create a Floral Head Wreath
Lia Griffith
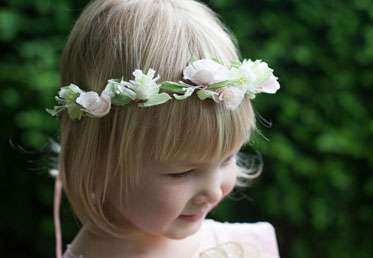
In Part 1, Lia shares a classic wedding project—a floral head wreath perfect for a flower girl, bridesmaid, or even a bride. Lia will walk you through each step of the wreath-making process, from making the paper flowers and buds, to attaching them to the floral wire and finishing the ends with a pretty ribbon. Since the wreath is made from paper flowers, it will look great all day long and will last forever as a keepsake.
![]()
![]()
![]()

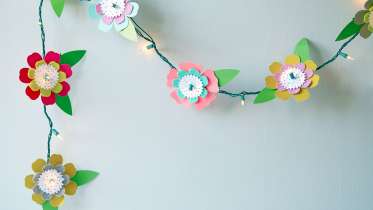
Paper Wedding Crafts: Make a Flower Garland Backdrop
Lia Griffith
In Part 2, learn how to make this stunning floral backdrop for your big day. Bedecked with gorgeous paper blooms and leaves, this backdrop would work perfectly behind an altar or even as a festive photobooth. Lia shares clear step-by-step instruction for cutting out the paper petals and leaves, making the blooms, and creating the garlands. The ribbon garlands are tied on to a branch at the end, making it easy to customize the size of your backdrop to suit your space. This is an ideal project to make with friends—throw a craft party and you'll have a gorgeous hanging backdrop whipped up in no time!
![]()
![]()
![]()
Paper Wedding Crafts: DIY Topiary
Lia Griffith
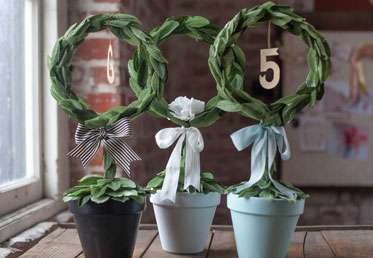
In Part 3, Lia puts a modern spin on classic topiaries by making them out of paper. To make this timeless wedding staple, you'll begin by painting a terra cotta pot and filling it with copper tubing and foam to create the topiary shape. After that, you'll cover the form with hand-cut crepe paper leaves to give it a lush, organic look. Lia shares ideas for embellishing the topiaries, and also shows you how to add decorative table seating numbers for an overall look that is earthy, handsome and classic.
![]()
![]()
![]()
Paper Wedding Crafts: Make 3-D Monogram Letters
Lia Griffith
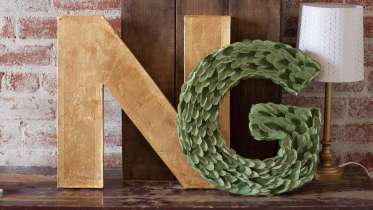
For Part 4, Lia presents a fabulous way to celebrate the happy couple on a large scale—with glamorous, monogram letters. These oversized 3-D letters are constructed with chipboard and paper tape, and the templates provided can be adjusted to make letters in any size you please. Once you've created the base, Lia shows you how to give the letter a luxe finish with gold leaf. She also shows how versatile this project can be by offering other ideas for decorating the letters with hand-cut paper leaves and silk flowers to create a completely different style.
![]()
![]()
![]()
Cricut Crafts: Paper Flower Chandelier
Annabel Wrigley
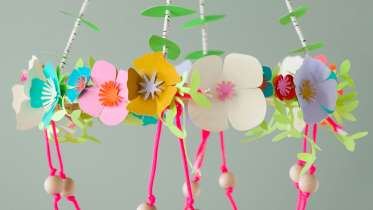
Make this bright, fun chandelier alongside Annabel Wrigley from Little Pincushion Studio. In this class, Annabel teaches you how to cut out all of the individual flowers and vines using a Cricut Explore machine. Once the pieces are cut out, it's a cinch to assemble the flowers with hot glue and string them on neon paracord. Add a few fun extra elements, like wooden beads and decorative straws, to finish off the look and add dimension.
![]()
![]()
![]()
Cricut Paper Flowers: Make a Hydrangea
Lia Griffith
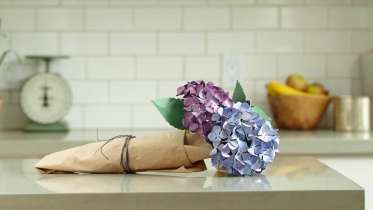
In this class, Lia shows how to make exquisitely detailed hydrangeas using a Cricut Explore machine. The Cricut is especially perfect for this project since you'll need to cut out lots of small, intricate pieces of paper to make the flowers. Once your leaves and petals are cut out, Lia will show you how to assemble the hydrangea blooms on floral wire, adding dimension to each piece to create perfectly rounded 3-D branches
![]()
![]()
![]()
Cricut Crafts: Flower String Lights
Annabel Wrigley
In this class, Annabel Wrigley demonstrates how to make a festive strand of lights featuring flowers cut on a Cricut Explore machine. These gorgeous, oversized flowers feature several textural fabrics, including paper, felt, and a leather-like fabric called Kraft-tex. Once the shapes are cut out, it's easy to assemble the flowers and attach them to a strand of lights.
![]()
![]()
![]()
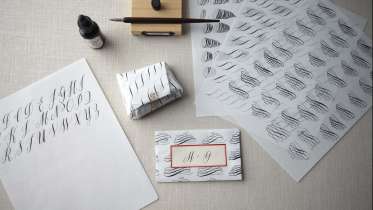
Beginning Calligraphy: Getting Started
Maybelle Imasa-Stukuls
The first step to learning calligraphy is getting familiar with your tools and materials. In Part 1, Maybelle introduces you to the inks, pens, and papers you will need to get started and show you the proper way to hold the pen. After you work through a few warm-up exercises, we'll move on to learning the uppercase alphabet. At the very end, Maybelle shares ideas for what to do with your pretty practice sheets once you've filled them up.
![]()
![]()
![]()
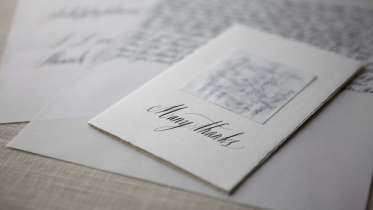
Beginning Calligraphy: Letters, Words and Phrases
Maybelle Imasa-Stukuls
Now that you've had a chance to warm up with exercises and practice your uppercase letters, you're ready to start putting some of these skills together. Part 2 introduces lowercase letters, and shows you how to smoothly connect your letters to form words. You'll also learn how to write common words and phrases, which you'll use to create beautiful personalized messages on notecards.
![]()
![]()
![]()
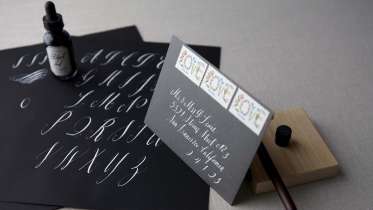
Beginning Calligraphy: White Ink on Black Paper
Maybelle Imasa-Stukuls
In Part 3, let's switch things up by practicing with white ink on black paper. Since you won't be able to use a guide sheet with black paper, this exercise helps you get comfortable with free-hand calligraphy and will loosen up your style. You'll also learn how to write numerals and punctuation, which we'll use together with letters to beautifully address an envelope.
![]()
![]()
![]()
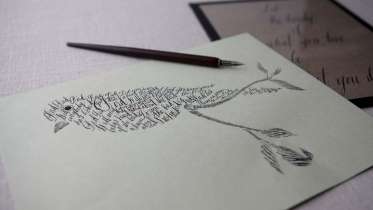
Beginning Calligraphy: Putting it all Together
Maybelle Imasa-Stukuls
Composition is a fundamental skill for creating professional-looking finished pieces. In Part 4, Maybelle teaches her technique for creating a beautiful layout, then shows you how to transfer your design to the paper you would like to use. This transfer technique is ideal for creating hangable artwork, frameable quotes and perfectly imperfect invitations. Maybelle also shares a fun technique for creating an illustration using calligraphy, where you entirely fill a shape with words.
![]()
![]()
![]()
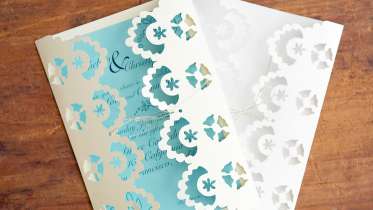
Cricut Crafts: Lace Greeting Cards
Courtney Cerruti
Using simple materials, you can create your very own beautiful, inexpensive wedding or bridal shower invitations using Cricut Explore. Courtney demonstrates how to load the lace template into the Design Space, as well as how to create a gatefold and tie the card together with ribbon.
![]()
![]()
![]()
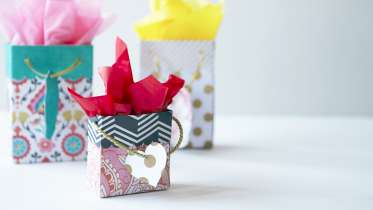
Cricut Crafts: DIY Gift Bags
Lia Griffith
In this class, Lia shows how to make customized gift bags and gift tags using a Cricut Explore. The Cricut will cut out and score the printed cardstock, making assembly quick and easy. Lia will show you how to add ribbon handles, giving your gift bags a clean, professional finish. These gift bags can be cut out and stored flat for later use or assembled on the spot.
![]()
![]()
![]()

Cricut Crafts: DIY Gift Card Holder and Envelope
Lia Griffith
Learn how to make custom gift card holders and envelopes using a Cricut Explore cutting machine. The Cricut will cut out and score your printed cardstock and write a professional handwritten greeting with the Cricut Antiquity pen. Lia Griffith shows you how to assemble your gift card holder and envelope and finish it off with a chic ribbon closure. This is the perfect way to add a personal touch to an otherwise impersonal gift card.
![]()
![]()
![]()

The Wilton Method: Mastering Buttercream - Baking and Icing 101
Wilton Instructors
The techniques covered in Part 1 will be the foundation upon which all of your buttercream skills are built. (Literally.) Stephanie demonstrates how to prep a cake for icing by leveling and torting it, and then explains how to mix the ultimate buttercream icing with ideal color and consistency. Finally, you'll learn how to use a decorating bag and spatula to ice a perfectly smooth cake with a decorative star border.
![]()
![]()
![]()
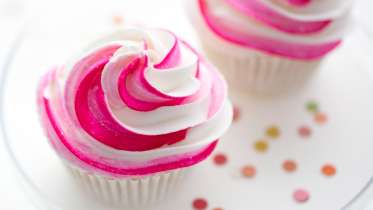
The Wilton Method: Mastering Buttercream - Decorating Cupcakes
Wilton Instructors
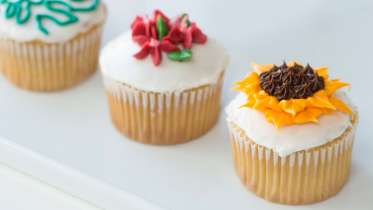
In Part 2, Stephanie introduces you to the world of decorating tips and bags. Using cupcakes as your canvas, you will learn how to bake, core and fill cupcakes, then top them off with buttercream swirls, rosettes, dots, loops, lines and more. It's easy to take these techniques beyond the cupcake and add borders, patterns and texture to cakes as well.
![]()
![]()
![]()
The Wilton Method: Mastering Buttercream - Gel Transfer Cakes
Wilton Instructors
In Part 3, learn how to transfer any design onto cake using the gel transfer technique. This magical effect is easier than you might think, and Stephanie walks you through all the steps, from transferring your design onto a smoothly iced cake to creating different icing textures using decorating bag tips and buttercream icing. You will also learn how to finish off your cake with writing—perfect for adding a special message or birthday wish.
![]()
![]()
![]()
The Wilton Method: Mastering Buttercream - Flowers and Leaves
Wilton Instructors
In Part 4, round out your buttercream skills by learning how to create floral designs on cupcakes and cakes. Using buttercream icing and a variety of decorating bag tips, Stephanie shows you how to make leaves and a sunflower, plus you'll learn bonus techniques, including a brush embroidery design and a Cornelli lace pattern.
![]()
![]()
![]()

The Wilton Method: Three Ways to Ice a Cake
Wilton Instructors
In this quick class, Emily teaches three easy ways to ice a cake with buttercream: using an icing comb, a fork, and a spoon. Each of these techniques creates gorgeous, textured effects. Use them to decorate any cake, creating a unique, stunning presentation.
![]()
![]()
![]()
The Wilton Method of Cake Decorating: Bake a Naked, Layered Chocolate Cake
Wilton Instructors
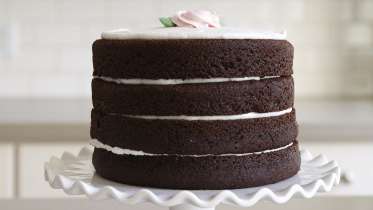
In Part 1of our multi-part course, learn how to bake the perfect chocolate cake and ice it with velvety buttercream icing. Emily will teach you how to prep your ingredients, mix them and bake the cakes, all while avoiding the three C's (crowning, cracking, and crumbing). Once the cakes have cooled, you'll be ready to level and torte the cakes plus assemble them in a multi-layer stack. Emily will also show you how to whip up a batch of buttercream and ice the cake like a pro.
![]()
![]()
![]()

The Wilton Method of Cake Decorating: Cupcakes with Buttercream Swirls
Wilton Instructors
Part 2 is all about cupcakes and piped buttercream. First, you'll learn all of the piping basics, like how to change the consistency and color of buttercream, how to fill a decorating bag, and proper hand positioning. From there, you'll learn how to make pretty rosettes, classic swirls and other fun ideas for adding stripes. Once you've taken this class, you'll be a piping bag pro, ready to create a colorful dessert table with lots of gorgeous texture.
![]()
![]()
![]()
The Wilton Method of Cake Decorating: Fondant Tiered Cake with Metallic Circles
Wilton Instructors
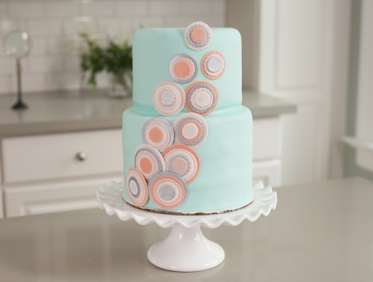
In Part 3, Emily will teach you how to use fondant to create a smooth finish on a stunning tiered cake. Emily demystifies this sometimes intimidating medium, walking you through everything you'll need to know to successfully decorate cakes with fondant. You'll learn how to color fondant, roll it out, cover a two-tiered stacked cake, and create decorative fondant cut-outs to give the cake beautiful geometric dimension.
![]()
![]()
![]()
Now Playing
The Wilton Method of Cake Decorating: Easy Royal Icing Flower Cake
Wilton Instructors
In Part 4, you will learn how to make a show-stopping buttercream-iced cake, featuring royal icing drop flowers. Emily will show you how to make royal icing from scratch, mix colors to make a harmonious palette, and then use a variety of decorating tips to make flowers of different shapes, sizes, and hues. The surface of the cake is iced with a beautiful free-motion buttercream swirl, and then the drop flowers are grouped on top of the cake to create a stunning, organic arrangement.
![]()
![]()
![]()
Preserves, Liqueurs and Infusions
Kelly Wilkinson
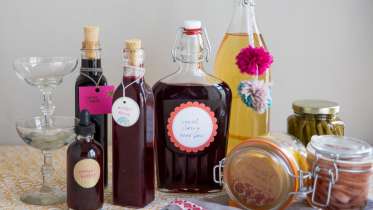
In this class, Kelly and Sarah share six recipes for holiday preserves, all of which make perfect gifts for your favorite foodies. From boozy concoctions to pickled veggies, each recipe is super-simple, quick-to-make, and requires a relatively short wait period before they can be consumed. Alcohol-based recipes include a grapefruit-ginger infused vodka, a cherry-vanilla-orange bourbon, coffee liqueur, and orange-fig bitters. For non-alcoholic options, recipes include a zippy preserved lemon, a no-fuss quick pickle, or a tart, sweet syrup called a shrub made from cranberries and pomegranates.
![]()
![]()
![]()
Handmade Soap
Lindsey Stone
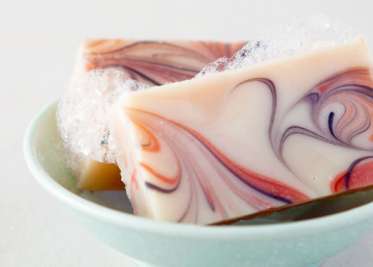
In one great smelling afternoon, you can learn the basics of cold process soap making and make enough soap for everyone on your holiday list. Lindsey from Clean Getaway Soap demystifies the process and walks you through a batch of soap from start to finish. Along the way you'll learn how to safely mix soap, add color and scent, and finish with stamps and gift wrap. Download the recipe to follow along.
![]()
![]()
![]()
Homemade Apothecary
Amy Karol
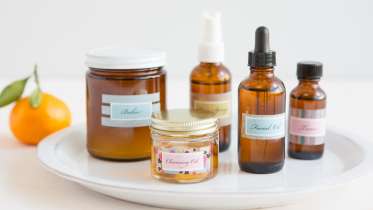
Make your own lip balm, facial oil, deodorant, and more, by looking no further than your pantry or local health food store. Amy expertly demystifies the ingredients you need and offers recipes and ratios that result in delicious smelling, high-quality beauty products that will leave your skin and body radiant.
![]()
![]()
![]()
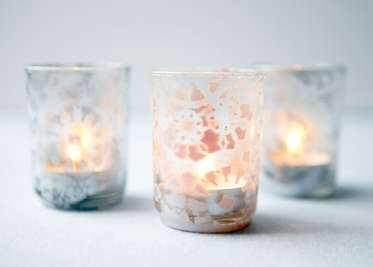
Spray-Painted Votives
Courtney Cerruti
Whether you're hosting a dinner party or a special holiday gathering, we all know that lighting is key. Learn an easy way to transform plain glass votives using paper doilies and spray paint – perfect for adding sparkle to a dinner table or cozy nook.
![]()
![]()
![]()
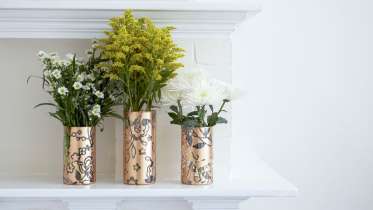
Cricut Crafts: Make Stenciled Vases
Courtney Cerruti
Upcycle old vases or bottles with this fun, quick Cricut project. Courtney demonstrates how to use the Cricut Explore to create a floral stencil, and then she spray-paints the pattern onto a glass vase. Drop in a votive or add some water with your favorite fresh flowers and you will have a lovely new table decoration.
![]()
![]()
![]()
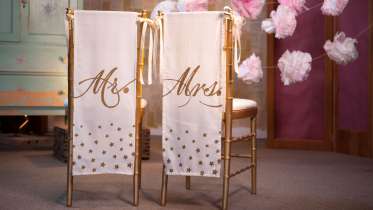
Mr. and Mrs. Chair Banners
Hello!Lucky
Create a regal setting for the couple of honor with these chair banners. The Hello!Lucky sisters show you how to create custom fabric chair banners using freezer paper stencils. The banners drape gracefully across the chairs and the stencil creates a crisp, silkscreened effect. You can use the provided template or create your own design to match any wedding décor.
![]()
![]()
![]()

Glassine Cake Topper
Hello!Lucky
Snazz up your parties with a cake-topper that you can customize to fit your style and décor. This project comes together quickly and uses cupcake liners for a frilly, festive border. Eunice and Sabrina of Hello!Lucky show you how to make these miniature frames that sweetly perch atop your desserts to transmit your handmade-chic style.
![]()
![]()
![]()
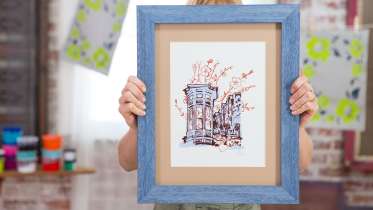
How to Cut a Mat and Frame Your Artwork
Hilary Williams
Having your artwork and photos professionally framed can be pricey—especially if you have several pieces to frame. In this class, Hilary Williams shows how to professionally mat and frame your artwork at home for a fraction of the price. You will learn how to mount and back artwork of any size and add a dust cover to finish it off. Whether you're an artist with a collection of pieces that need to be framed, or you simply want to frame your favorite family photos, this class will show you exactly how simple it is to get a professional look at home.
![]()
![]()
![]()

How to Sew Napkins
Liana Allday
In this class, Liana Allday shares three different ways to make and finish cloth napkins. Learn how to make playful fringed-edge napkins, faux rolled-hem farmhouse napkins, and classic mitered corner napkins. Whether you're throwing an extravagant dinner party or making a batch to give as a gift, Liana shares how easy it is to select fabrics that will cater to your occasion. These napkins require minimal sewing, making them the perfect skill-building project for beginners.
![]()
![]()
![]()
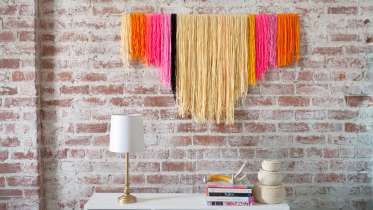
DIY Yarn Banners
Courtney Cerruti
Add color and texture to any space with these simple, decorative yarn banners. Courtney will show you two ways to make these vibrant banners: with knots for a textured look or with glue for a seamless look. This class is a perfect way for anyone to get crafty with yarn, both knitters and non-knitters alike.
![]()
![]()
![]()

Photo Booth Backdrop
Hello!Lucky
Every party is better with a homemade photobooth! Eunice and Sabrina of Hello! Lucky show you how to take a bedsheet and dye it to create an ombre effect. Then you'll learn how to add dimension by creating lovely strands of gold stars. The photobooth comes together simply and encourages all your guests to loosen up and strike a pose.
![]()
![]()
![]()
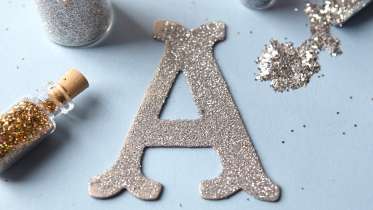
Glitter 101
Courtney Cerruti
Learn everything there is to know about glitter in this quick (and sparkly) class. Courtney Cerruti demonstrates the proper way to apply glitter to glue, and best practices for getting the excess back in the jar. All types of glitter are covered here, from kids craft glitters, to specialty crushed glass, and spray paint.
![]()
![]()
![]()

Painted Wooden Centerpiece
Courtney Cerruti
A good tablescape needs an eye-catching centerpiece to draw it together. Courtney demonstrates a variety of ways to paint and stylize wooden rounds that you can lay on your table for a pretty presentation. You will learn how to paint and stencil wooden rounds with spray paint, how to create color block designs, and how to use chalkboard paint and add a seasonal message. Mix and match your centerpieces, then complete your table decorations with coordinated votive candles.
![]()
![]()
![]()
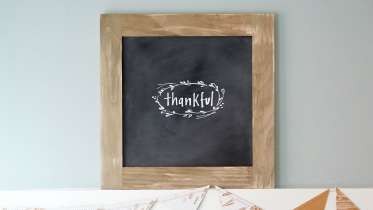
Distressed Wooden Chalkboard Sign
Courtney Cerruti
Create a rustic looking chalkboard sign that you can change with the seasons. Using the magic of steel wool and apple cider vinegar, Courtney guides you through aging a wooden frame to perfection. You will learn how to create your own chalkboard backing and then complete the project with a message written in chalk.
![]()
![]()
![]()
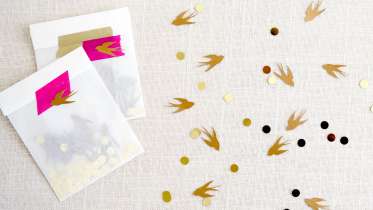
Cricut Crafts: Make Celebration Confetti
Courtney Cerruti
Learn how to use a Cricut Explore to cut out bird-shaped confetti from paper — perfect for any celebration. A template is provided so that you can cut out a whole sheet at once, and as an added bonus, Courtney shows a fun, simple way to package confetti as a handout for party guests.
![]()
![]()
![]()
Who's Recently Taken This Class
Meet other Creativebug crafters who have recently taken this class.
Wilton Cake Decorating 2a Coupler
Source: https://www.creativebug.com/classseries/diy-wedding/the-wilton-method-of-cake-decorating-week-4
Posted by: shotwellenbraing.blogspot.com
0 Response to "Wilton Cake Decorating 2a Coupler"
Post a Comment